Bulk edit objects
Bulk editing allows administrators to update fields on multiple objects at the same time. This is useful when you need to apply the same change across several objects instead of editing them individually.

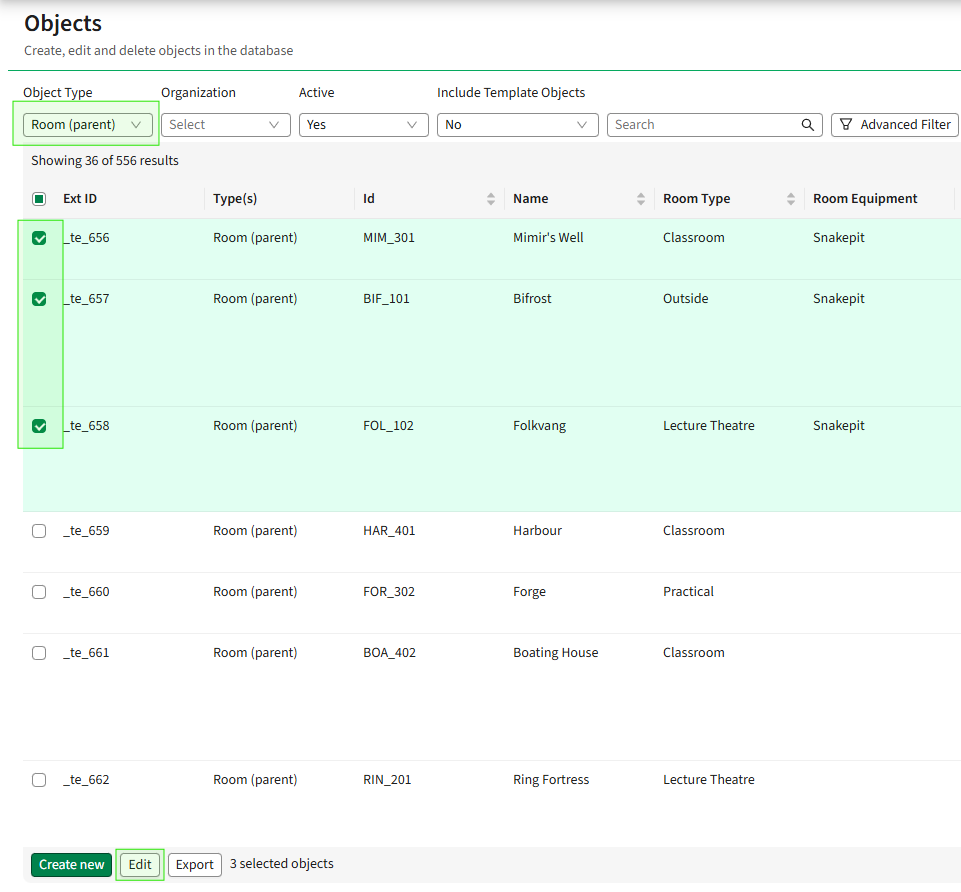
Select Objects
- Go to Admin → Objects.
- Select the object type you want to edit.
- Use the checkboxes to select the objects you want to update.
- Click Edit.
Next to the Edit button the number of currently selected objects is displayed.
Edit fields
- Click Edit and select Fields.
- Choose how each field should be updated.
Each field can be configured with a different update option.
Field update options
The following options are available when updating fields:
Keep as is
The field will not be changed for the selected objects.
Find and replace
Replaces a specific value in the field.
- Enter the value you want to search for in Find.
- Enter the new value in Replace with.
Add
Adds a value to the field for all selected objects.
Replace all
Replaces all existing values in the field with one or more new values.
Remove specific
Removes a specific value from the field if it exists on the selected objects.
Clear
Removes all values from the field.
Apply changes
After configuring the field updates, confirm the edit to apply the changes to all selected objects.
Edit general information
You can use bulk edit to update general properties for multiple objects at the same time.
Select objects
- Go to Admin → Objects.
- Select the object type you want to edit.
- Use the checkboxes to select the objects you want to update.
- Click Edit and select General info.
Update general properties
In General info, you can update the following settings for the selected objects.Each setting provides different update options depending on the property.
Property
Defines the type or classification of the object. The available values depend on how the object type is configured in your system.Examples of possible values include:
- Follow type
- Abstract
- Virtual follow type
- Virtual abstract
- Template object
For this field, you can choose:
Keep as is
The property will remain unchanged.
Find and replace
Replace a specific property value with another.
Replace all
Replace the current property with a new value for all selected objects.
Personal data
Indicates whether the object contains personal data.For this field, you can choose:
Keep as is
The current value will remain unchanged.
Find and replace
Replace one value with another. Possible values include:
- Yes
- No
- Not specified
Replace all
Replace the value for all selected objects with a new selection.
Is active
Determines whether the selected objects are active in the system. For this field, you can choose:
Keep as is
The current active status remains unchanged.
Check all
Marks all selected objects as active.
Uncheck all
Marks all selected objects as inactive.
Apply changes
After configuring the updates in General info, confirm the edit to apply the changes to all selected objects.
Edit relations
You can use bulk edit to update relations between objects. This allows you to add, replace, or remove relationships for multiple objects at the same time.
Select objects
- Go to Admin → Objects.
- Select the object type you want to edit.
- Use the checkboxes to select the objects you want to update.
- Click Edit and select Relations and memberships.
Update relations
For each relation, you can choose one of the following update options.
Keep as is
The existing relations will remain unchanged for the selected objects.
Add
Adds new relations to the selected objects.
- Select the object type you want to relate to.
- Use the search field to find objects.
- Optionally use the advanced filter to narrow the search results.
- Select the objects you want to relate.
- Click Update object to apply the new relations.
Find and replace
Replaces one relation with another.
This process consists of two steps.
Step 1 – Find and select
- Use the search field to locate the objects you want to replace.
- Choose how the search should behave:
- Match all
- Match one
- Optionally apply the advanced filter.
- Select the objects you want to replace.
Step 2 – Replace with
- Scroll to Replace with.
- Search for and select the new objects that should replace the existing relations.
Replace all
Replaces all existing relations with new ones.
- Search for the objects you want to use as the new relations.
- Select the objects that should replace the existing relations.
Remove specific
Removes selected relations from the objects.
- Search for the relations you want to remove.
- Select the specific objects to remove from the relation.
Clear
Removes all relations from the selected objects.
Apply changes
After configuring the relation updates, confirm the edit to apply the changes to all selected objects.
Edit memberships
You can use bulk edit to update memberships between objects. Memberships define hierarchical or structured relationships between objects, such as parent–child relationships.
Select objects
- Go to Admin → Objects.
- Select the object type you want to edit.
- Use the checkboxes to select the objects you want to update.
- Click Edit and select Relations and memberships.
- Go to the Membership section.
Update memberships
For memberships, you can choose one of the following update options.
Keep as is
The existing memberships remain unchanged for the selected objects.
Add
Adds the selected objects to a membership.
- Select the object type that has a membership rule.
- Choose the member object you want to add.
Memberships are limited by the configured rules. For example, a Room object may have a membership structure with parent and child objects.
- Select the object you want to add to the membership.
- Click Update objects to apply the change.
Find and replace
Replaces one membership with another.
This process has two steps.
Step 1 – Find and select
- Use the search field to locate the membership objects you want to replace.
- Choose the search behavior:
- Match all
- Match one
- Optionally use the advanced filter to refine the search.
- Select the objects you want to replace.
Step 2 – Replace with
- Scroll to Replace with.
- Search for and select the membership object that should replace the existing one.
Replace all
Replaces all existing memberships with a new membership object.
- Select the object type.
- Choose the object that should replace all current memberships.
Remove specific
Removes a specific member object from the selected objects.
- Search for the member object you want to remove.
- Select the membership to remove.
Clear
Removes all memberships from the selected objects.
Edit organization nodes
You can use bulk edit to update organization nodes for multiple objects at the same time. This allows you to add, replace, or remove organization nodes from selected objects.
Select objects
- Go to Admin → Objects.
- Select the object type you want to edit.
- Use the checkboxes to select the objects you want to update.
- Click Edit and select Organizations.
Update organizations
For organizations, you can choose one of the following update options.
Keep as is
The existing organization assignments remain unchanged for the selected objects.
Add
Adds an organization node to the selected objects.
- Click Add.
- Browse the organization node tree to locate the organization.
- You can also use the search bar to find a specific organization node.
- Select the organization node you want to add.
Find and replace
Replaces one organization node with another.
- Choose how the search should behave:
- Match all
- Match one
- Search for the organization node you want to replace.
- Select the organization node from the search results.
- Choose the organization node that should replace it.
Replace all
Replaces all current organization nodes on the selected objects with a new organization node.
- Select the organization node that should replace the existing assignments.
Remove specific
Removes a specific organization node from the selected objects.
- Search for and select the organization node you want to remove.
Clear
Removes all organization nodes from the selected objects.
Batch operations
When running a bulk edit, the system creates a batch operation. Batch operations allow administrators to monitor the progress and results of bulk edit jobs.
Open batch operations
- Go to Admin → Objects.
- After starting a bulk edit, locate Batch operations in the top-right corner.
- Click Batch operations to view the list of jobs.
The list displays both ongoing and completed operations.
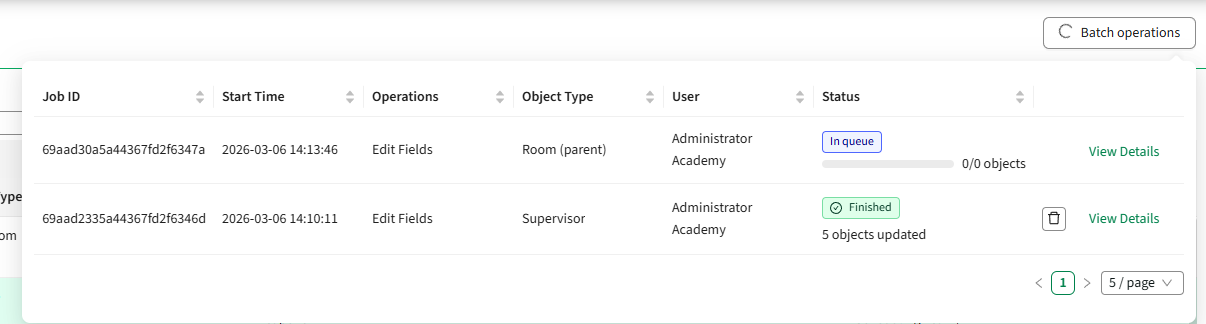
Batch operations overview
The batch operations list includes the following information:
**Job ID -**A unique identifier for the operation. This ID can be used when troubleshooting with support.
**Start time -**The date and time when the job started.
**Operation -**The type of operation that was performed, such as a bulk edit of fields, relations, or organizations.
Object type - The object type affected by the operation.
User - The user who initiated the batch operation.
Status - The current status of the job:
- Ongoing
- Finished
- Failed
You can also see how many objects were successfully updated.
View job details
To see more information about a batch operation:
- Click Details next to the job.
A detailed view of the operation will open.
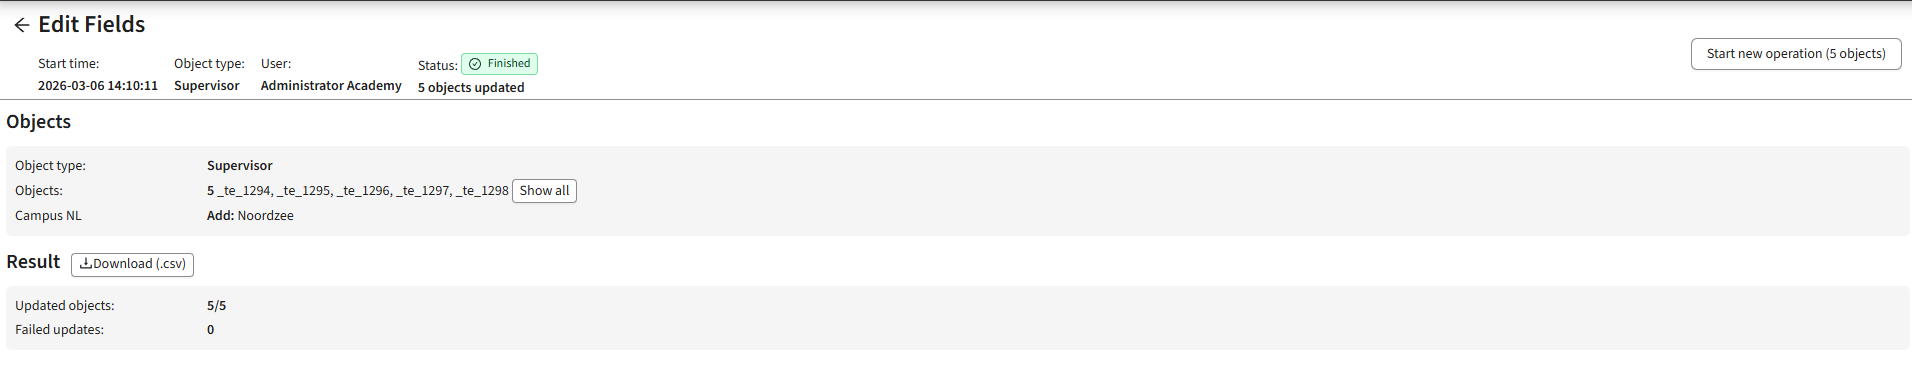
Job details information
In the job details view, you can see:
- The total number of updated objects
- The number of failed updates
- A summary of the operation
You can also download the results as a CSV file for further review.
Start a new operation from a previous job
From the job details view, you can quickly start another operation using the same objects.
- In the top-right corner, click Start new operation.
- The system will reuse the objects that were included in the original job.
This allows you to run additional bulk edits without selecting the objects again.
For example, you might:
- First update fields on a set of objects.
- Then run another operation on the same objects to update organizations.
View objects used in the job
In the Objects section of the job details view:
- Click Show all to see the full list of objects included in the batch operation.
- From this list, you can also start a new operation using the same objects.
This makes it easy to run multiple bulk edits on the same set of objects.