Creating and Managing Reservations

How do I create a reservation?
When you schedule in TimeEdit, you do this with reservations. You use the calendar view in TE core to create and manage reservations.
A reservation contains a number of objects of various types, and has a start time and an end time. It can also include various free texts. The types of reservations that can be created and the types of objects that can be used are tailored to your organization, and for this reason may not exactly match the examples in this article. A reservation contains the following information:
- Date
- Weeks
- Start time
- End time
- Objects
- Comments
Creating a reservation
To create a reservation, you choose the objects you want to book and then drag the reservation out to, or in the calendar. Follow these steps:
- Choose the preferred reservation mode in the box above the selection list. The types that are marked with a "x1" must be selected before you can post the reservation in the calendar.
- Choose a type on the selection list. The objects you are allowed to book will then be shown on the object list on the left. If no objects are displayed on the object list, you can search for them using the search field above the list. If no results appear as you type, try clearing the "Related" check box below the field.

- Select an object on the object list by clicking it. The object will then be moved to the selection list. Now do the same thing with the following types on the selection list until you have the objects you want. Go to the calendar and drag the reservation on the timeslot you want it. Finished!
Creating additional reservations with the same objects
It's easy to create additional reservations containing the same objects you already selected.
To create additional identical reservations containing the objects already selected, simply use the mouse pointer to drag them to the locations in the calendar window where you want to create the reservation.
You can naturally use CTRL+C and CTRL+V to copy and paste reservations into the calendar window.
Note: When you drag reservations out to the calendar using the mouse pointer, it is always the objects currently on the selected list that are scheduled.
Editing information of a reservation
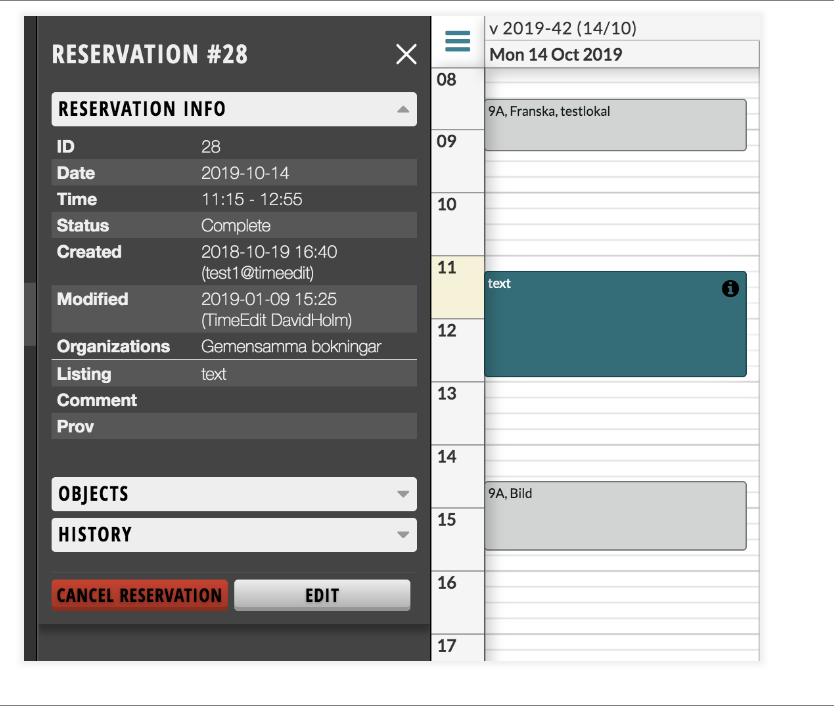
On each reservation you will find an information icon. If you hover over this icon information about the reservation will appear. If you click the icon, reservation information appears in the side menu, such as comments, when it was created and edited, and by whom.
At the bottom of the side menu you can choose Edit or Edit all, depending on whether you want to add a comment to an individual reservation or several reservations.
With the keyboard shortcut CTRL+E, you can directly enter edit mode for reservation texts for active reservations.
ADD SCREENSHOTS
Editing objects in a reservation
When you want to edit the objects of a reservation, this can be done as followed:
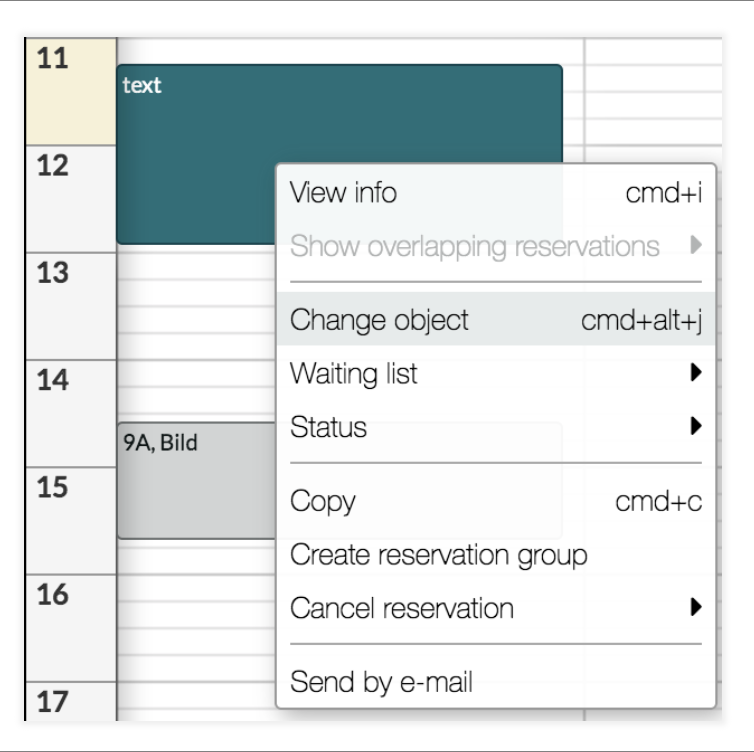
- Right-click the reservation you want to edit in the calendar window. Now choose "Change object".
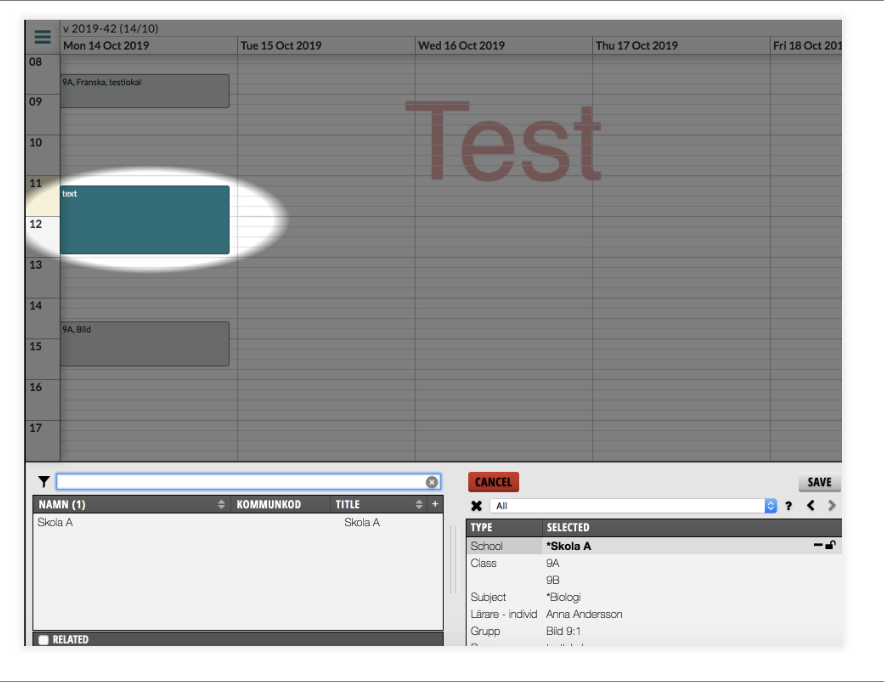
- The reservation now enters edit mode and the reservation is highlighted. We can now access the selection list again. You can now change the reservation using the selection and object list. Don't forget to "save".
Moving a reservation
To move a reservation, just use drag-and-drop to move it to a new location.
Changing reservation length
To edit a reservation, use drag-and-drop. Place the mouse pointer at either the upper edge or lower edge of the reservation, depending on the direction in which you want to change the time. Now press and hold the left mouse button and drag in the preferred direction.
Cancelling a reservation
Follow these steps to cancel a reservation:
- Select the reservation in the calendar by clicking it.
- As previously mentioned, the reservation information will be displayed on the left side menu. Click the red button at the bottom to cancel, and then click it again to confirm cancellation.
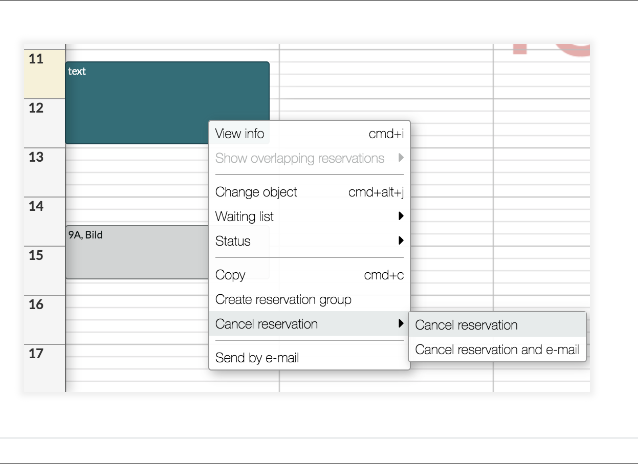
You can also right-click the reservation and then choose "Cancel".
